Difference between revisions of "Reskin Walkthrough"
m (Started refactor update) |
m (minor fixes) |
||
| Line 49: | Line 49: | ||
= Changing the skin = | = Changing the skin = | ||
To test your new skin, you'll add | To test your new skin, you'll need to add | ||
FarmingGame | FarmingGame | ||
to the 'GameVersion' enum in 'Assets/Scripts/CompanyMap/Master.cs' | to the 'GameVersion' enum in 'Assets/Scripts/CompanyMap/Master.cs' | ||
| Line 71: | Line 71: | ||
Your file-browser will open. | Your file-browser will open. | ||
Now, | Now, right-click on the language-file you want to edit and open it with a Spreadsheet-editor (e.g. LibreOffice Calc, Microsoft Excel). | ||
If asked, set the separator to 'Semicolon' (;). | If asked, set the separator to 'Semicolon' (;). | ||
Revision as of 11:48, 25 May 2022
This page will explain how you would go about implementing a new 'skin' in the game. Specifically, we will be implementing a farming-themed skin.
Important: Make sure Unity isn't set to compile for 'WebGL Platform'. To check this, go to your build-settings (File->Build Settings...). If it is set to WebGL, click on 'Dedicated Server' and press the 'Switch Platform' button in the lower right-hand corner of the window.
Adding Building Sprites
In 'Assets/Scripts/CompanyMap/Master.cs', add
[Header("Farming Game")]
public Sprite SpriteFarmhouse;
public Sprite SpriteField;
public Sprite SpriteChickenCoop;
public Sprite SpriteBarn;
When you now open the 'Assets/Scenes/Pearhub'-scene and click on '_Master' in the Hierarchy, you should see the sprite variables you just added in the Inspector.
Now create a new folder in 'Assets/Images/CompanyMap' and name it according to the skin you are creating. Since we are creating a farming-themed skin, we will be naming the folder 'FarmingGame'.
Then drag the building images into the newly-created folder.
Note that newly added Sprites must be set to be centered bottom center, so that they will align with all other sprites.
After the images have been added to the project, drag the images into their respective variable-slots in the Inspector of _Master. Note that, if you're using SVGs, you will need to click on the arrow to the right of the image and drag the sprite-file instead of the SVG-file.
Adding the Building Type Definitions
Create a 'FarmingGame' folder in 'Assets/Scripts/CompanyMap/Building/BuildingTypes' and create
Farmhouse.cs,
Field.cs,
ChickenCoop.cs,
Barn.cs
scrips inside that 'FarmingGame' folder.
TODO add remaining doc when prerequisites are done
Changing the skin
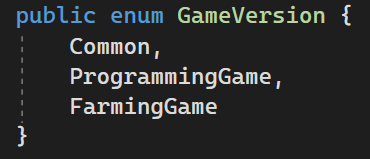
To test your new skin, you'll need to add
FarmingGame
to the 'GameVersion' enum in 'Assets/Scripts/CompanyMap/Master.cs'
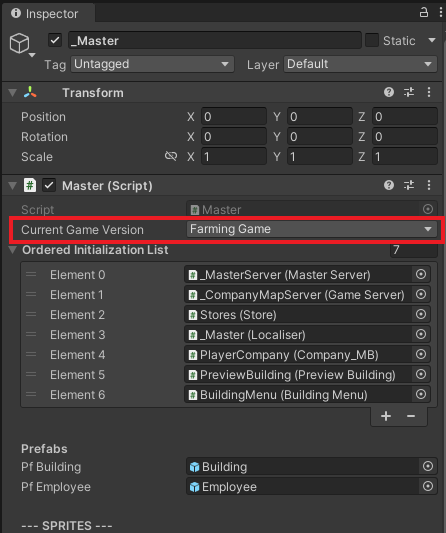
Then, select the '_Master' GameObject in the hierarchy and switch the 'Current Game Version' variable in the inspector to 'FarmingGame'.
Now, when you start the game, you should see that your changes have taken effect.
Localisation
Currently, the labels of the buildings in the store still print the translation-string. To change this, we'll need to add translations for the languages we want to support.
Go to 'Assets/Resources/localisation' and right-click on a file, then open it in your file-browser (Explorer in Windows).
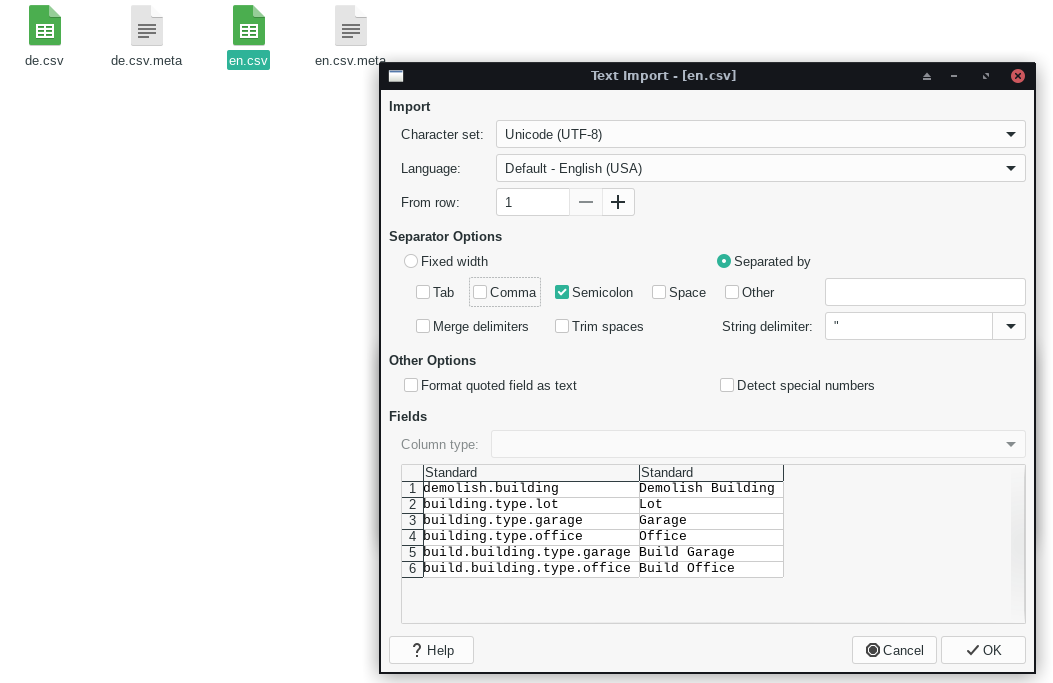
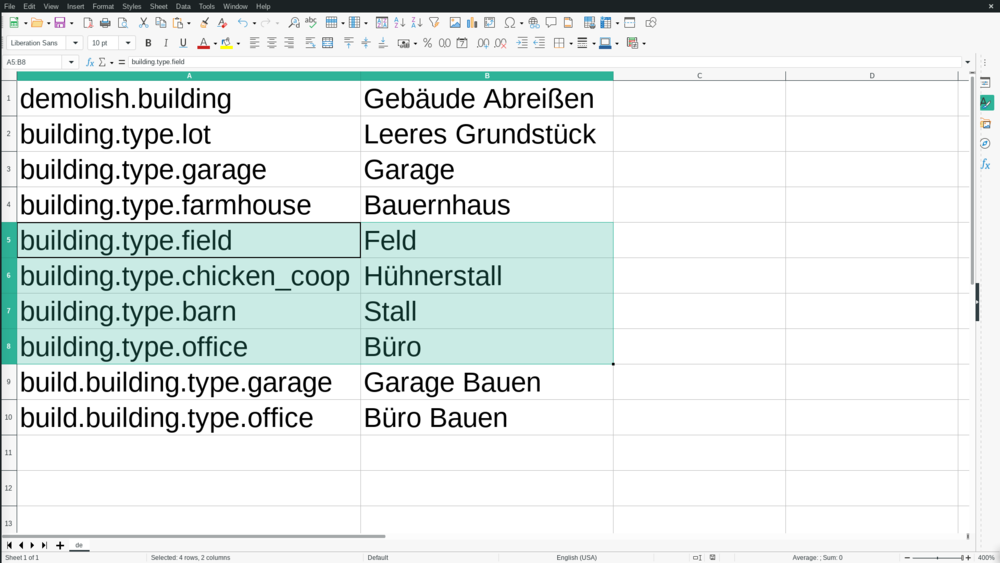
Your file-browser will open. Now, right-click on the language-file you want to edit and open it with a Spreadsheet-editor (e.g. LibreOffice Calc, Microsoft Excel). If asked, set the separator to 'Semicolon' (;).
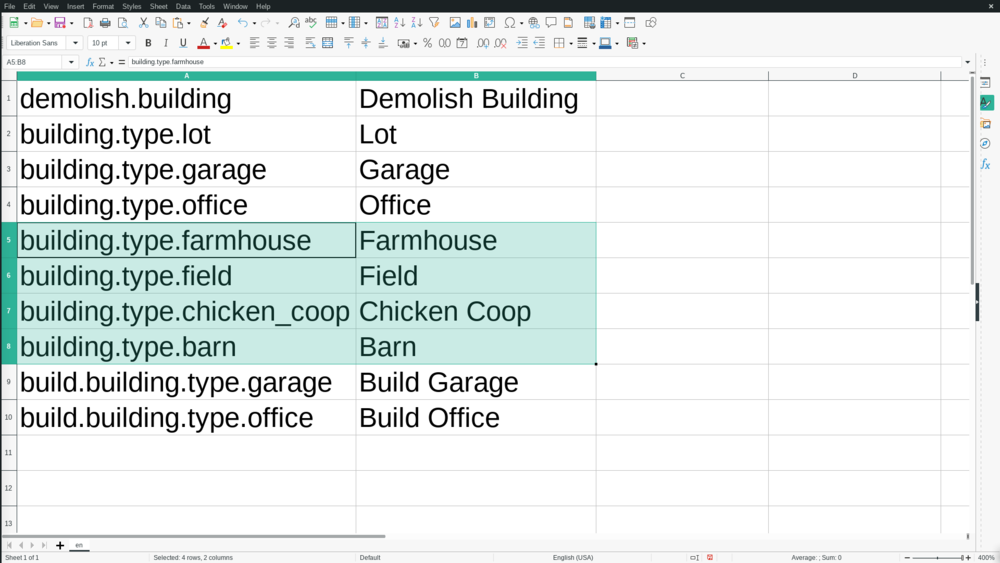
Add the translation-strings of the buildings you created in the first column and their translation in the second column. You can add the rows anywhere you like, though it might be a good idea to keep the localisation-files organised.


